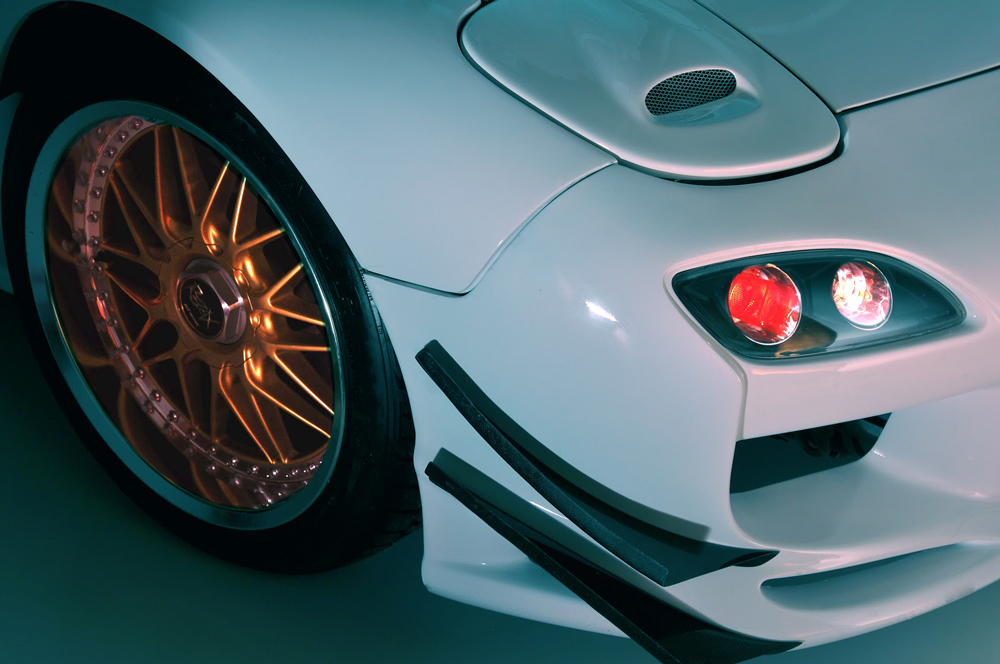
How to Shoot Professional Car Photos with a $0.01 Budget
So you want to photograph a car like the pros, but you’re broke as shit.
This article will give you instructions on how to fabricate a makeshift legitimate photography studio, provide a list of suggested tools and items for success, instructions on how to acquire necessary lighting equipment for free, some advice and techniques on how to light the car, and will provide general warnings, tips, as well as some backstory for the success of the project.

Backstory:
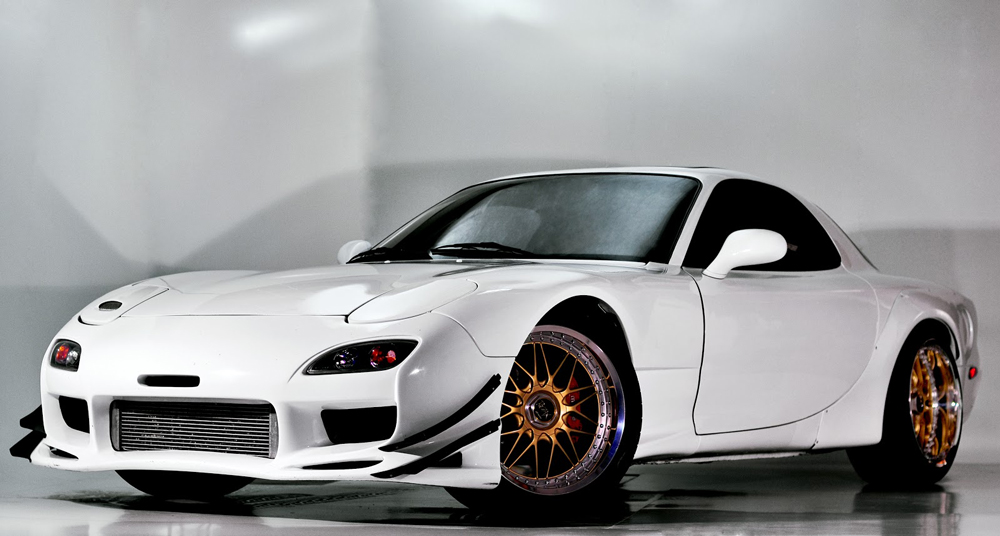
So I’ve been tinkering with a semi-professional photography hobby for about a year now. A colleague of mine, JD Schendel, took notice of my interest and proposed that I capture his modified ’94 Mazda RX-7. Within one day he acquired approval from his wife and booked me a flight. The project was officially on my plate and on its way to becoming a realized production. Rather than panic – as I have absolutely no experience in car photography – I welcomed a complete fascination with the idea of successfully crushing this project- a.ka. delivering results featuring an impressive outcome…on zero budget.
I was taking an engineering design course in college, and the professor’s husband came in to speak. A former technical designer for Nike sneakers, Dimitri Bozikis, told us that, “if you can draw a car, you can draw anything.” Cars have so many curves, features, planes, shapes, surfaces, and different reflective materials and textures that it makes it a real challenge to draw, but in our case, they make it a real challenge to light effectively for the sake of taking professional photographs.
When it comes to photography, it’s all about lighting, lighting, and lighting. Take a look around at some automobile photography shots. Look at published professional advertisements but especially inspect the amateur level car photos featured in specialty forums (if you know which make/model car you are shooting, they most definitely have forums pertaining to the cult following of obsessed enthusiasts).
You can tell which ones were taken with iphones and which ones had a digital SLR.
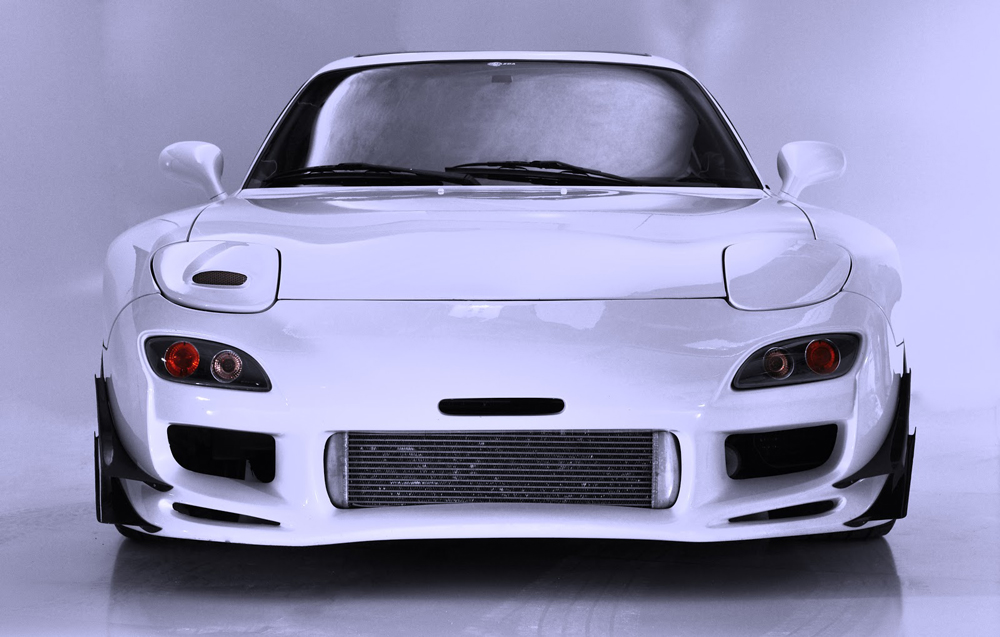
Next, assuming that the car has been washed/waxed, you’ll be able to notice reflections of the car’s surroundings inside the paint job..specifically on the doors and hood and especially reflecting off of the windshield and other windows. I mentioned that you should study amateur photos, as high end luxury automobile brands spend tens if not hundreds of thousands of dollars on their photography – between the photographer, the location scouting and location rental, the lighting equipment rental, catering, hotels, taxis, per diems, etc – and then they go ahead and also spend a good chunk of money on post production photography retouching and photoshopping. Our goal today is to shoot professional car photographs with no budget.
Personally, I had never shot an automobile before. I am also basically a complete amateur on lighting objects. So I did a fair amount of research on the internet on how to light a car, how to photograph a car, reviewed a decent body of automobile related photography, and critiqued the shit out of everything that I studied. You’ll find that on a bunch of forums, many words of advice pretty much just say “good luck”, “this is hard”, and “shoot somewhere with high ceilings.” Lighting and photographing cars featuring a matte paint job might prove to be a much simpler task, but for now, let’s tackle the hard stuff.
For this project, I decided it would be best to shoot the car indoors in a “controlled” environment, as opposed to outside in the wild. This way we could power and shape the lighting, regardless of weather conditions, location scouting, permits, and access to luxuries such as electrical outlets and restrooms. With some ingenuity, patience, a sharp eye for details, and some good old fashion elbow grease, it’s possible to nail some really professional looking photographs of your car (that won’t hardly need any photoshopping) and can be done on virtually no budget. Here’s how it’s done.
8 Steps for A Successful No Budget Professional Car Photo Shoot
List of items you should already have access to:
Camera (we used a nikon D90)
Len(s) of choice (we used a nikkor 50mm f/1.4 and nikkor f/2.8 fish eye)
Remote trigger (nikon ML-L3)
Tripod
Ladder
Rags/Towels for cleaning and clean up
Duct Tape
Tape measure
Phillips head Screwdriver
Scissors
If you do not already have access to or possession of any of the above items, most of them can be purchased and returned in the same way (and most at the same location) as the following items.
List of items to be acquired:
2 x set of white bed sheets
White tile board sheets
4 x work lamps
4 x 25 foot extension cords
Twine
Step 1: Determine where the shoot will take place.
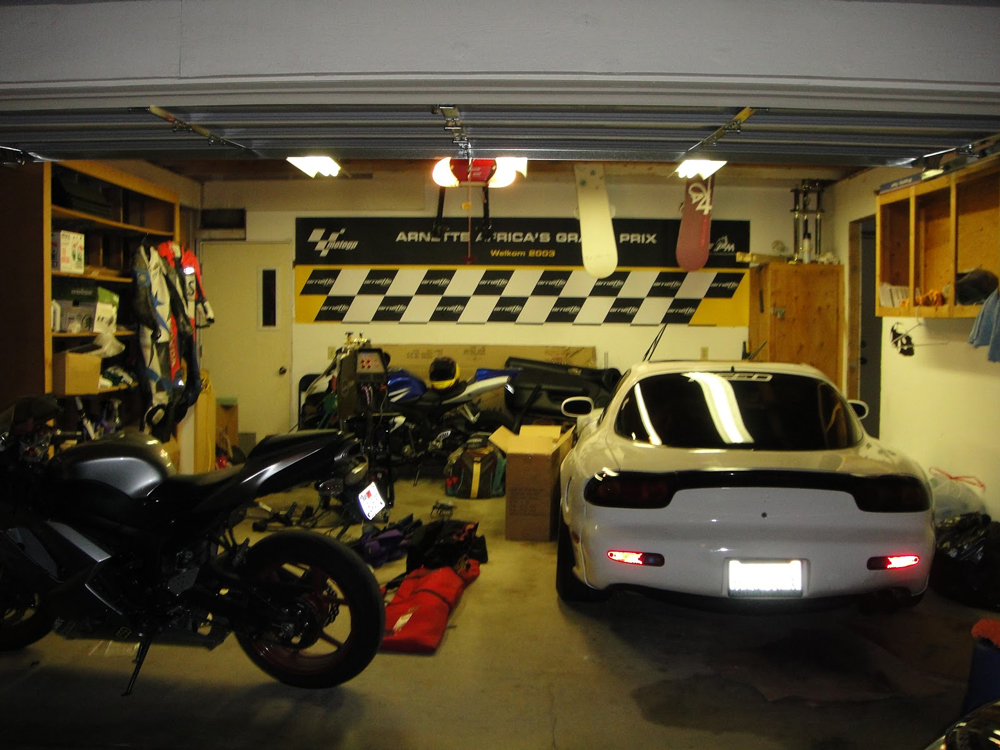
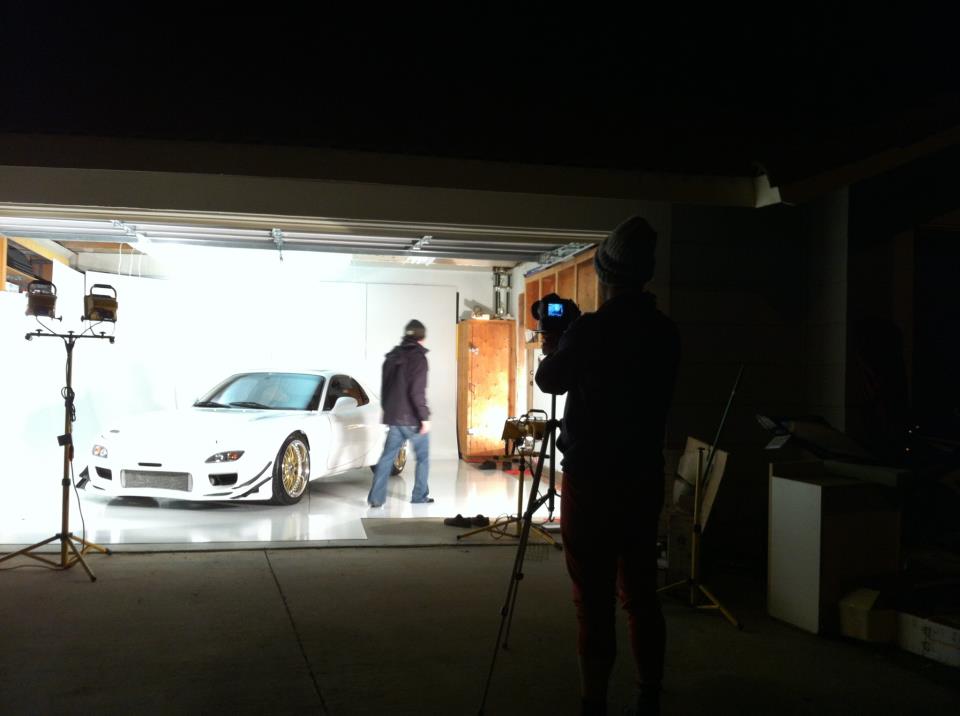
Lucky for us (with blatant undertones of sarcasm) our location was a standard 2 car garage located in the suburbs of Sun City, California. In this respect, anyone with a car and a garage can replicate my process. I had JD send me some pictures of his garage in advance, as I was interested in studying and familiarizing myself with the work space. The ceilings were about 9 ft high, and the perimeter was lined with various immovable furniture installations (shelving units, cabinets, etc).
Once on site, go ahead and measure the wall lengths with a tape measure and mark this down – you’ll use this information to determine how many white tile board sheets you’ll need, also, go ahead and purchase 2 or 3 extra sheets as you will find some way to use these.
Luckily there were some decent halogen light fixtures installed, which we would use to light the car from above, with some slight alterations of course.
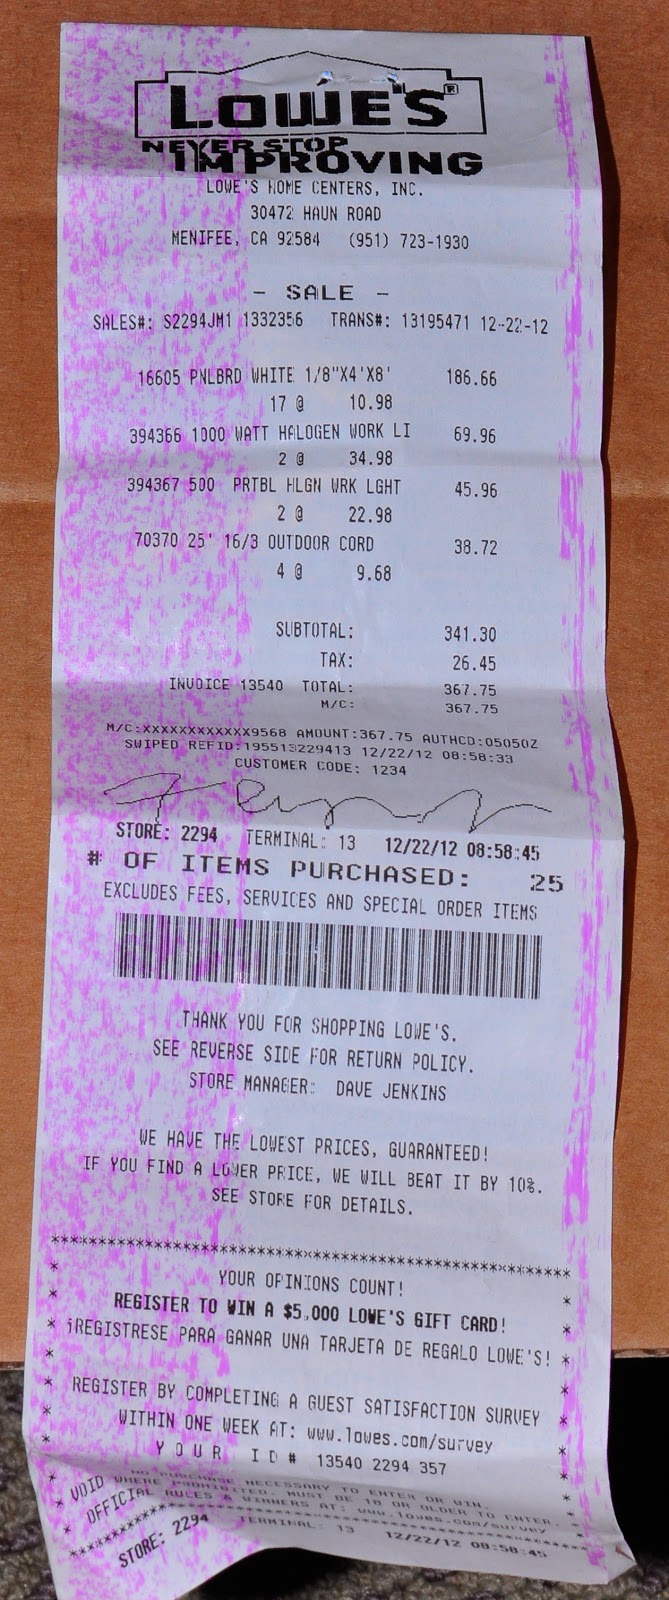
Step 2: Purchase the supplies needed.
You will need to take a trip to Lowe’s (or Home Depot) and Target (or somewhere comparable with a bed linen section).
Grab the following supplies.
17 x White tile board sheets (this number may vary depending on the dimensions of your space)
4 x double head halogen work lamps
4 x 25 foot extension cords
Twine
2 x set of white bed sheets (only item not at Lowe’s or Home Depot)
Each lamp purchased needs its own extension cord. Make sure to keep all packaging and not to rip and destroy anything that you don’t have to.
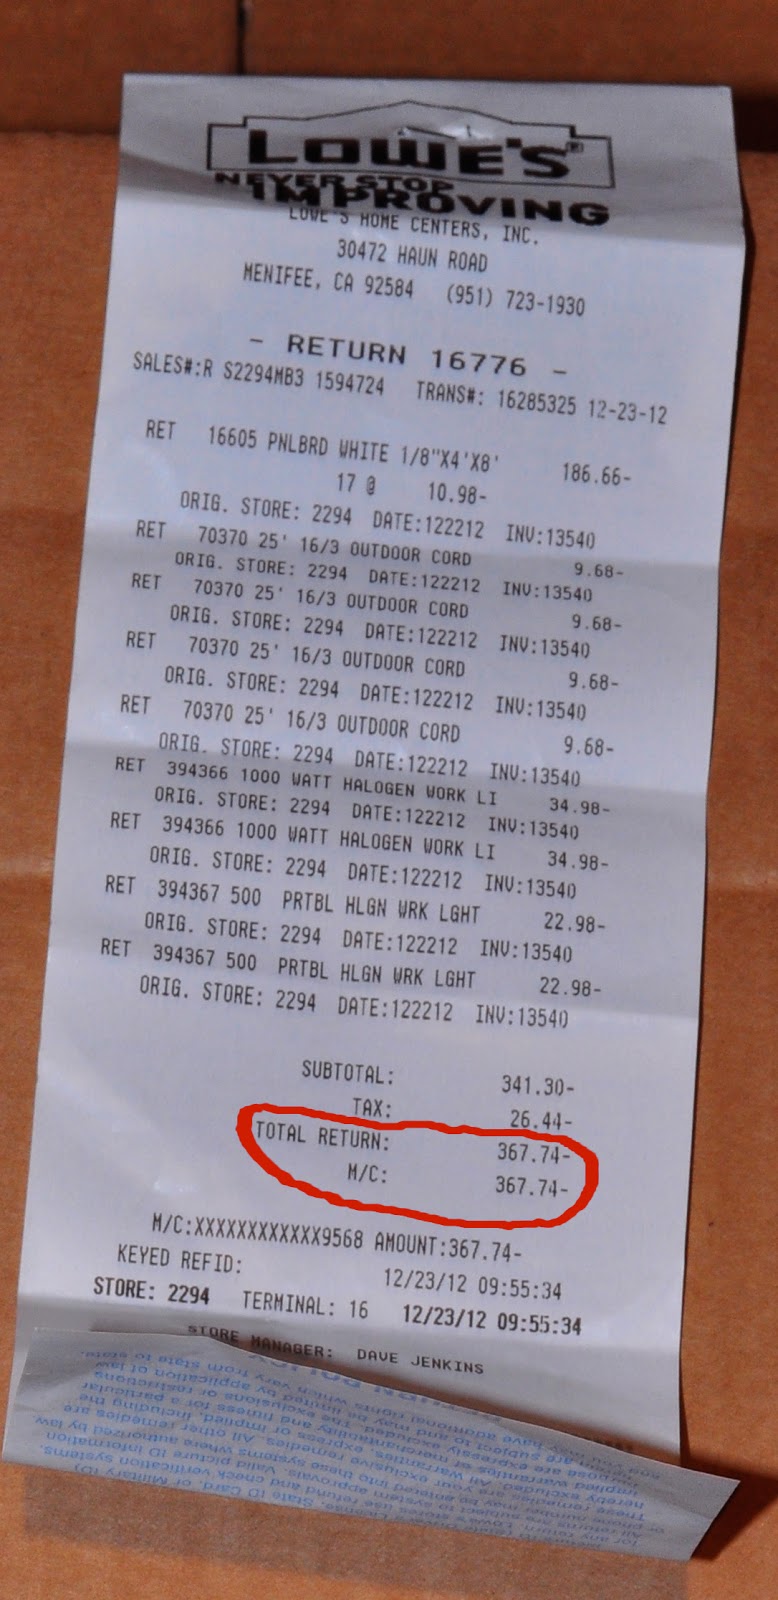
Make sure to save your receipts. You will be returning all of these items and receiving a full refund.
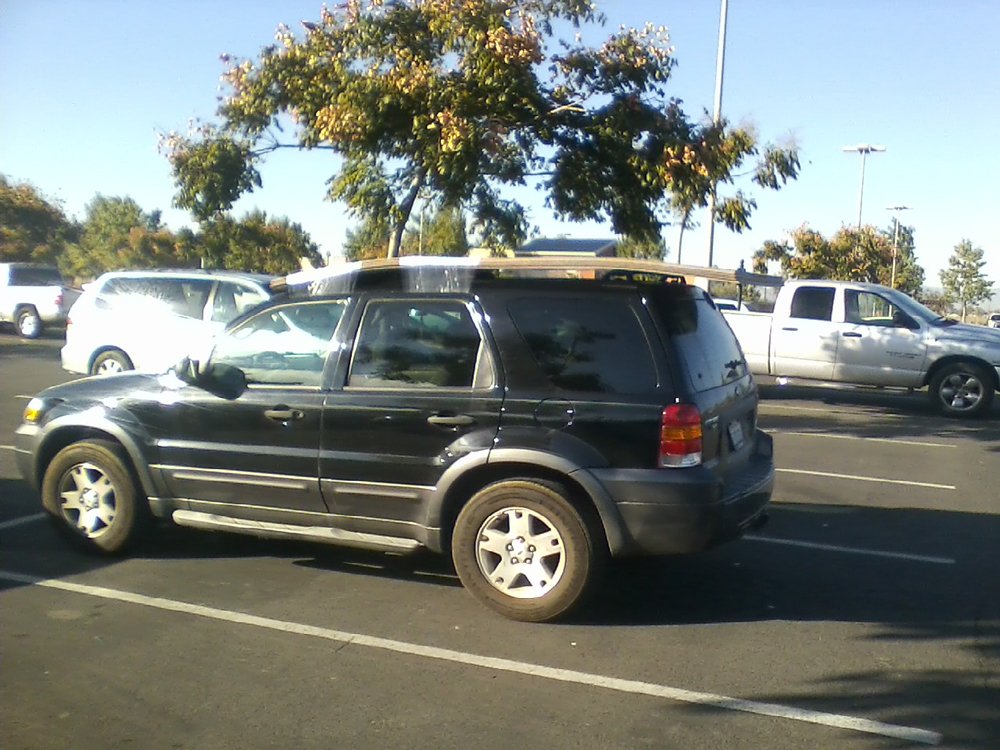
We strapped the pile of white tile boards to the roof of JD’s Ford Escape and secured it with complimentary plastic wrap. The plastic wrap and twine are located by the loading zone. We also made sure to unwrap the plastic when unloading, rather than cutting it, so that we could re-use the material for the return. The rest of the items fit into the car easily.
Step 3: Prepare the primary light source.
I watched this video, which features advice from one of the adobe photoshop programmers on how to light and photograph a car:
The #1 technique that I took away from this video was that he used one light source, located above the car. Basically, there were several lights hung above the car, and a “blanket” was stretched out to block harsh obvious light sources and also to dump and fill the entire blanket with consistent soft light, essentially creating a giant soft box.
I wanted to recreate this technique, as It seemed like it did a great job of lighting the curves of the car, and at the same time created a consistent reflection of a large soft white surface in all the windows..as opposed to trees, clouds, signs, people, light stands, and whatever else you’d find in real life. I also liked how he had a ladder and was able to use it in order to capture some more dynamic angles.
Anyhow, I did some research on the internet on how to make your own DIY soft boxes and read about which materials made for the best light diffusors. There’s a fabric called “nylon ripstop” which got all kinds of great reviews. I also read that white bed sheets could work. As a seasoned veteran of fabric store shopping, I know that once you cut a fabric, there’s really no returning it. So I decided that a trip to JoAnn Fabrics for the rip stop nylon would end up costing us money and that perhaps wasn’t worth it, especially since there were no unanimous guarantees that it was the absolute best option for the job. So I decided to go with the bed sheet option.
I purchased 2 sets of california king size white bed sheets from Target (I think the thread count was 250 and they came in a draw string pouch which included 1 full sheet, 1 fitted sheet, and 2 pillow cases). I purchased 2 sets because I had an inclination that 1 layer of sheet would not be as effective as 2 layers, and felt that the fitted sheet would probably cause problems.
Go ahead and grab the 2 full size flat sheets. Make sure that the sheets aren’t all wrinkled. I spent over an hour ironing out all the creases.
Tip: In retrospect, to save time, put them in the dryer!
Once the wrinkles are out, lay the 2 sheets on top of one another and proceed to fasten them together with duct tape. Start in one corner and tape them together. Use about a 3.5 in strip of tape and fold it around the edges of the sheet. Do this about 5 or 6 times along the sides, in addition to binding the corners. We are basically trying to transform 2 sheets into 1 double ply sheet.
Now that we had a soft box diffusor light blanket, we needed a way of fastening it over the light source. So we took about 40 feet of twine from the loading area of Lowe’s and cut it into 3.5 foot lengths. We secured 1 strand in each of the corners of our sheet with duct tape. We used out pre-existing strips of tapes along the perimeter of the sheet to loop and hitch additional pieces of rope. So we had 4 corners, and 2-3 additional rope supports on each side. We used these ropes to tie around the rafters in the garage so that the sheet would hang and cover the light fixtures.
The ladder came in handy for this task, as there was some trial and error involved with the positioning and effectiveness. The sheet ended up not being long enough to cover all 3 light fixtures, but fit just long enough to successfully cover 2. So we decided to unwire the third light altogether. Adjustments were made, the blanket slid over to cover the 2 light sources. Play around with the droop/tightness of the fastening ropes so that the blanket achieves an even spread of light distribution. Avoid hot spots and inconsistency by loosening and tightening accordingly.
We had a large bulky garage door light fixture under the blanket as well, which proved to be irritating. Even after achieving a beautiful and nearly flawless consistency throughout the blanket, the garage door light proved to be super annoying going on and off with motion sensing throughout the shoot. The 2 yellow lights in the unit could be seen through our white blanket and projected onto the car hood and windshield, which was considered unacceptable by my standards. This light source, although an annoyance, would make for good jokes during the shooting process as we periodically had to shuttle run through the house to shut it off.
Step 4: Prepare the studio.
Go ahead and clean out the work space of all clutter, garbage, and movable objects, as they could get in the way of the shoot. Once everything is out of the way, get a broom and/or leaf blower and tidy up the floor.
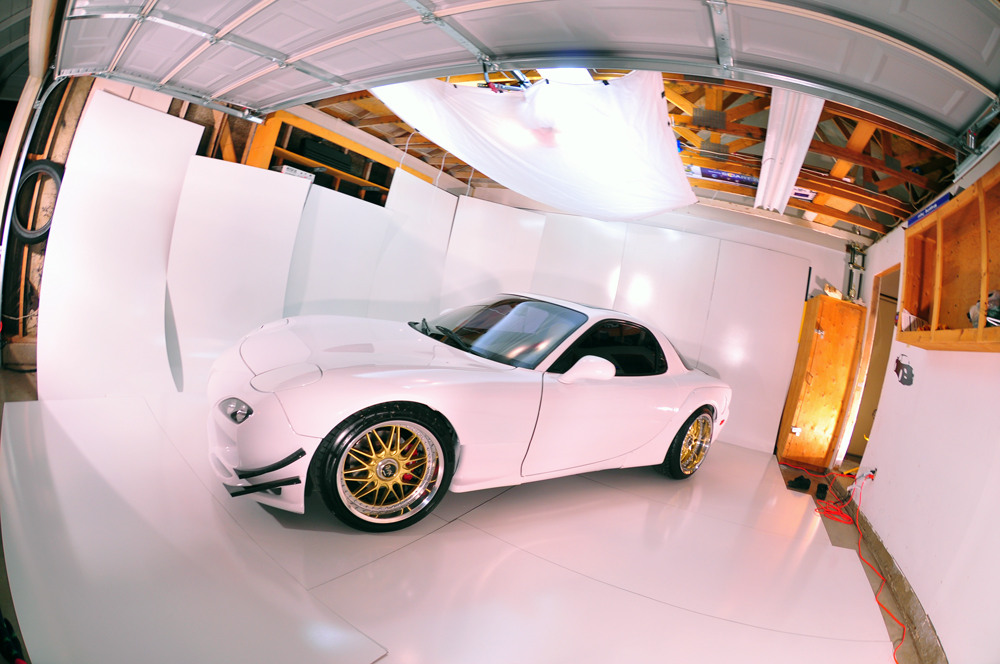
Next go ahead and line the walls with your sheets of white tile board. The goal is to create a white seamless backdrop and floor. The reflective properties of the tile board make for a dynamic effect.
Rather than laying them flush against the wall, we puled them out about 1.5 ft to 2 ft, creating a subtle transition curve from the floor to the wall. We found that the first wall was so easy to set up. it really looked great and virtually seamless. We used duct tape on the back of the sheets to help secure them to the wall. We also sparingly taped the cracks of sequential pieces together to help secure them to one another.
Warning: It is recommended to have 2 people hold the sheets at all times while setting them. I let go to look at something while JD was adjusting the angle of the transition and the panel bent forward and literally folded and snapped. Yikes.
When we got to the corner, we experienced some difficulties, as we wanted a rounded corner, rather than a right angle. The corner piece needed to be placed upright at a distance from he wall…so we piled some stationary objects (a wheel rim and tire jack) to act as support. We overlapped the 2 corner pieces with the top piece being closer to the camera…so that the crack would be minimal, if visible at all.
Lining the 2nd wall proved to be problematic as the garage door got in the way and we had to lower the height of the sheet, by increasing the transition by 3-4 inches, which shifted the weight and caused the sheets to slide out and fall.
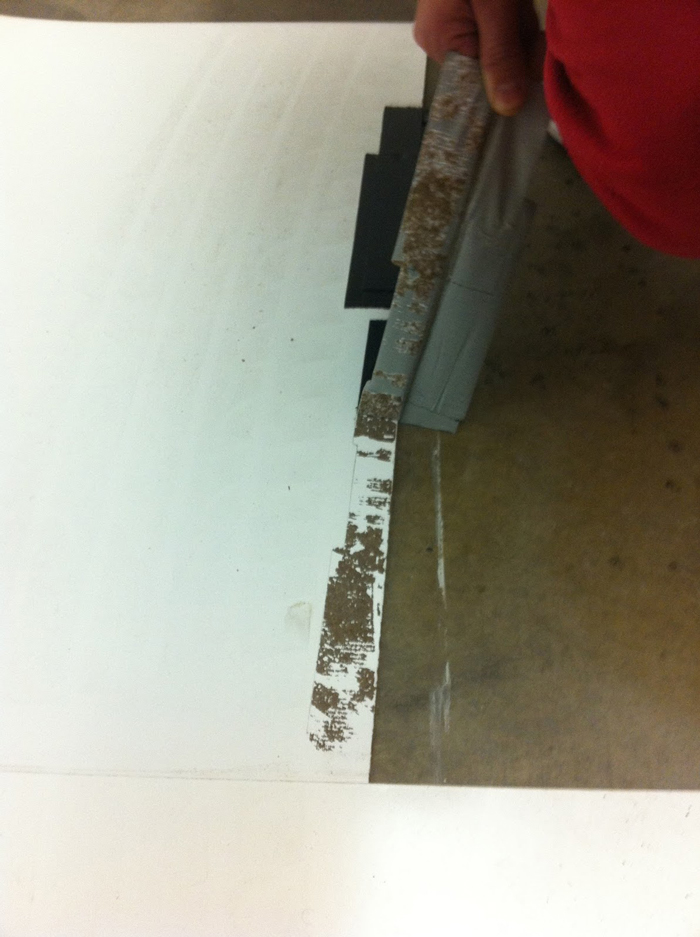
Warning: We used duct tape to secure the panels to the floor, but when we were done and peeled the tape up, it took the surface of the panel off. There was quite a bit of tampering and adjustments during this phase. .
We took the remaining panels and lined the floor with them. Starting from the back of the garage and overlapping the horizontal panel edges so that there were no harsh visible cracks from camera view. The unevenness of the 2nd wall’s panels created an unforeseen naked spot in the floor near the corner, as the right angle shapes of the sheets could not be tetrised together to create a seamless surface. We decided that the car would most likely be blocking this part of the studio setup so we moved on to the next step.
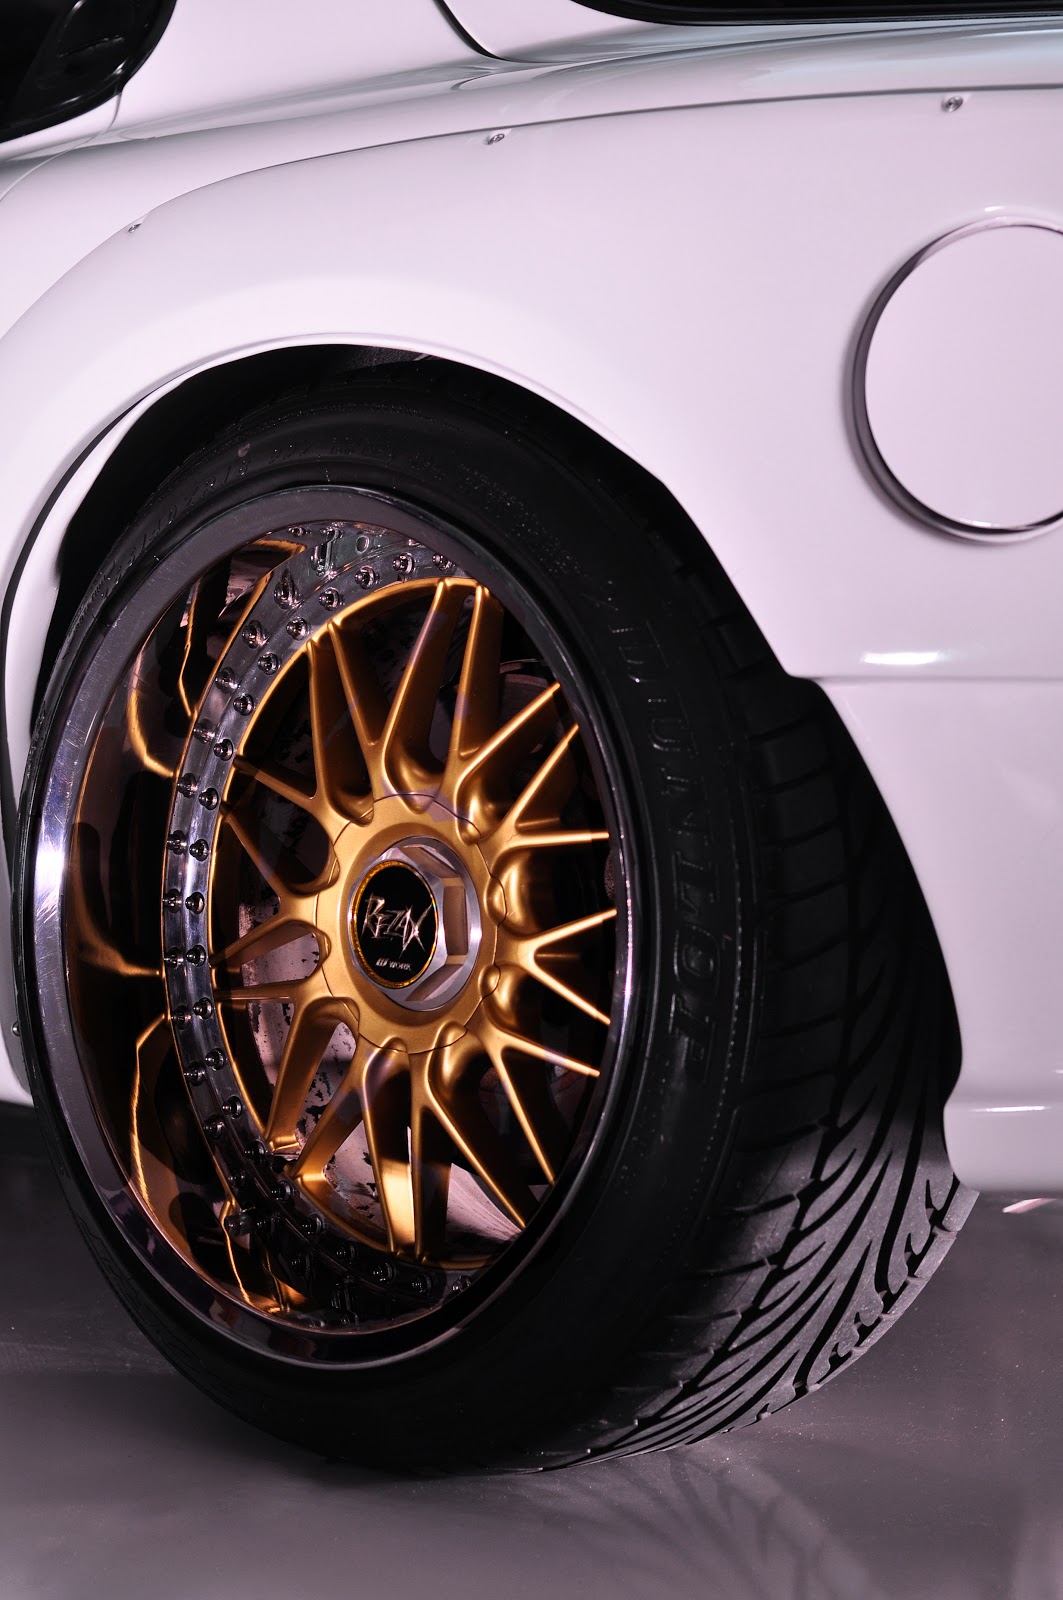
Warning: Watch out for dust/dirt accumulation from the car in the reflections of the tile board surface. When doing close up shots, the lighting will bring this detail to your attention. The tires and wheels will make use of the tile board more than anything else. See if you can use this to your advantage in creating successful compositions.
Step 5: Prepare the vehicle.
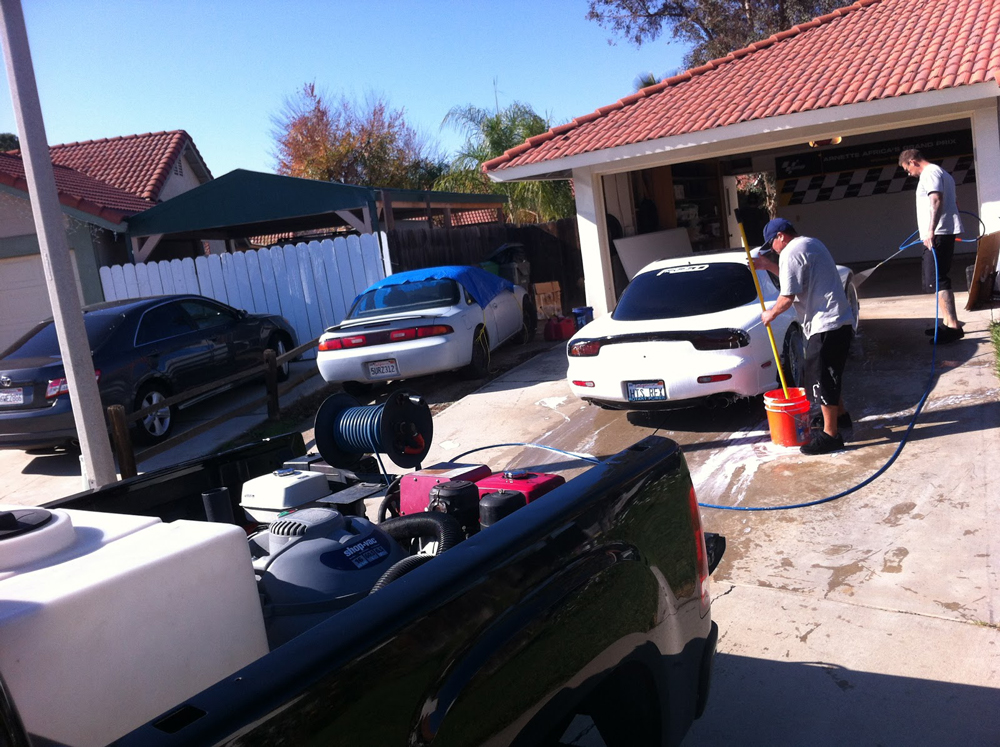
Make sure your car looks sexy. Go ahead and get it washed, waxed, dents removed, tires polished, the works. Good camera lens mixed with proper lighting are gonna pick up all the flaws and blemishes. JD called up 1DayDetails.com Mobile Auto Detailing and made an appointment for the morning of the shoot. These guys were no joke. They rolled up in a pickup truck equipped with a generator and a pair of pressure washers and washed, waxed, polished the car right there in the driveway. These guys were awesome and crushed it, except Angello was sporting a Dallas Cowboys hat, but what can you do.
Bring the car into the studio and park it for the first angle to shoot.
Warning: Be careful driving over the transitions of the makeshift studio wall curves. The weight of the vehicle caused some of the panels to move and created more work readjusting them. Just be careful and patient when moving the car for various angles as the space is small, tight, and delicate. Austin Powers called…
Step 6: Assemble the work lamps.
Carefully, without ripping the box, open it and take out all the components. Make sure to keep all styrofoam and plastic bags and place them back inside each respective unit’s box. We will be breaking these lamps back down and putting them back into their boxes and returning them to the store from which they came when we are finished with the shoot.
Take your time with these things as the glass elements (the glass face and the bulbs themselves) are super fragile . You’ll need a screw driver to open up the lamp gates so you can set the lamp bulbs in place. Once the lamp bulbs are in place do not install the lamp cover cages. These will just create annoying shadows on your car. Be extra careful with your lamps. Be sure to screw in and install the handles as you will be moving them often and they will get as hot as lava.
Step 7: Crush the Shoot.
Now that the studio is set up, the primary and supporting lights are prepped, the car has been cleaned and brought into the studio, it’s time to get on with the show.
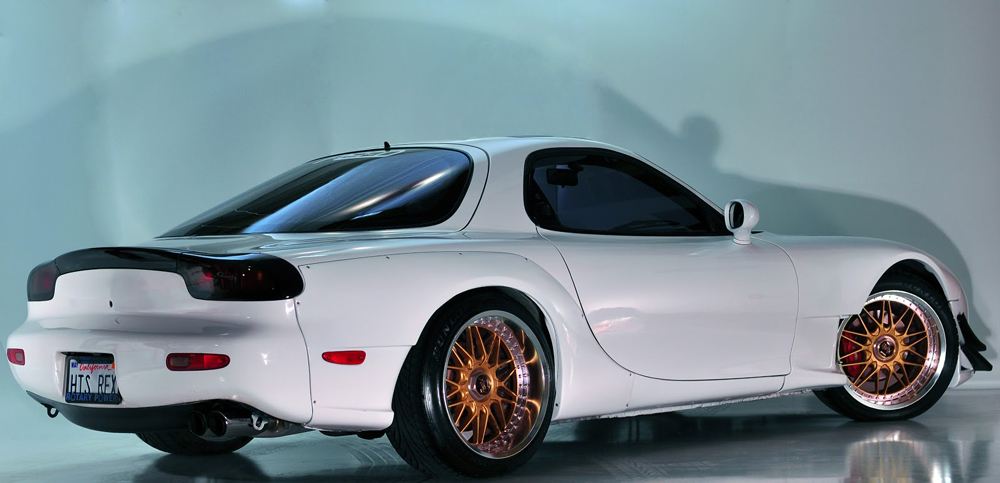
We had a system of starting from darkness and building up the light sources for each shoot angle. With the primary ceiling light on the car, take a test shot. Determine which planes on the car are interesting. You’ll want to use shadows to help contrast planes/features of the body kit. Also decide which features are worth highlighting (like the wheels for instance). Start with one work lamp and start lighting up these features.
Warning: These lamps will get extremely hot!
We thought it would be effective to use the pillow cases as soft boxes over the lamps. Do not attempt as the pillow cases will burn and most definitely catch on fire. Instead, experiment and play around with the distance and angles of the lamps. We even used the floor and walls to bounce the light. Also, you’ll be able to see the horizontal line of the light source projecting from the lamps. Use these to compliment the angles and lines of the car. Also you’ll want to avoid hot spots in the reflections of the paint job caused from the lamp bulbs. Play with distance, angles, multiple lamps washing out hot spots, and height of the tripod. Also, we had JD stand in the way of certain light spills and position himself so that he blocked them.
It was so funny when we were in Target rummaging through the sheets and an employee approached us and asked if we needed help. I asked her if the sheets were flammable and she got really uncomfortable as to what our intentions were and kind of just disappeared with no answer.
Also, there are 2 types of halogen work lamps: the single head unit on a small tripod and a double head unit on a larger tripod. Go ahead and only get the double head units. The single head units that we “purchased” featured an on/off button that was difficult to operate without getting burned on the hot casing of the used lamps. The double head units each feature a large, easy to press, red button…and each head features its own on/off button so you have some freedom with the available light source power with these units. Although the tripod stands are great, feel free to use the head units on the floor to help light the undercarriage, wheel wells, and the interior of the car. Try both lights on, or just 1, get creative, and have fun highlighting the essential features of the car.
Tip: The work lamps we purchased featured yellow halogen bulbs, so I had to adjust the white balance on my camera to the blue setting, so that the car looked white.
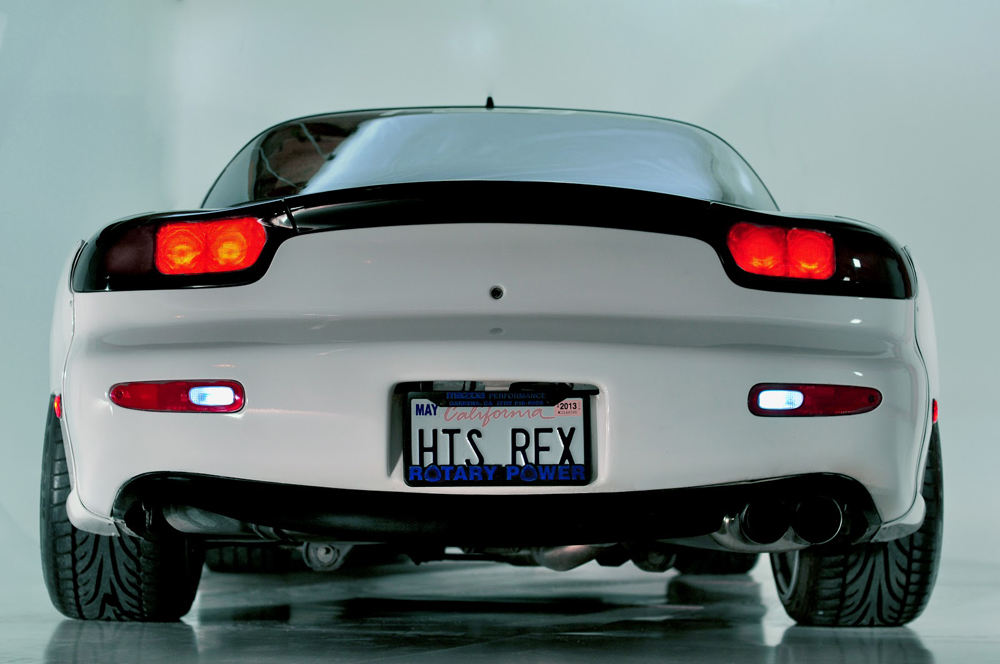
Remember to periodically shift your focus on the lens. Every time you move the camera, readjust. We got into the groove and started lighting the front of the car so effectively, so technically; it was magnificent – basically, we started getting good at this. Then we reviewed the photos and they were all out of focus. Our best composition was completely ruined and useless. We also played with turning certain lights on the car on/off to create more dynamic compositions (break lights, headlights, etc). Also hood raised, hood lowered.
Creating shadows on planes can be equally as important as lighting them up.

Step 8: Beat the System and Get Your Money Back.
God Bless America. My phrase is “burn it and return it.” Clean up, wipe down the tile boards from grease/oil/dirt, repackage all “purchased” materials, and return for full refund.
So long as you return all items in re-sellable condition, you shouldn’t feel bad. This is a widely practiced methodology in the production industry.
Conclusion:
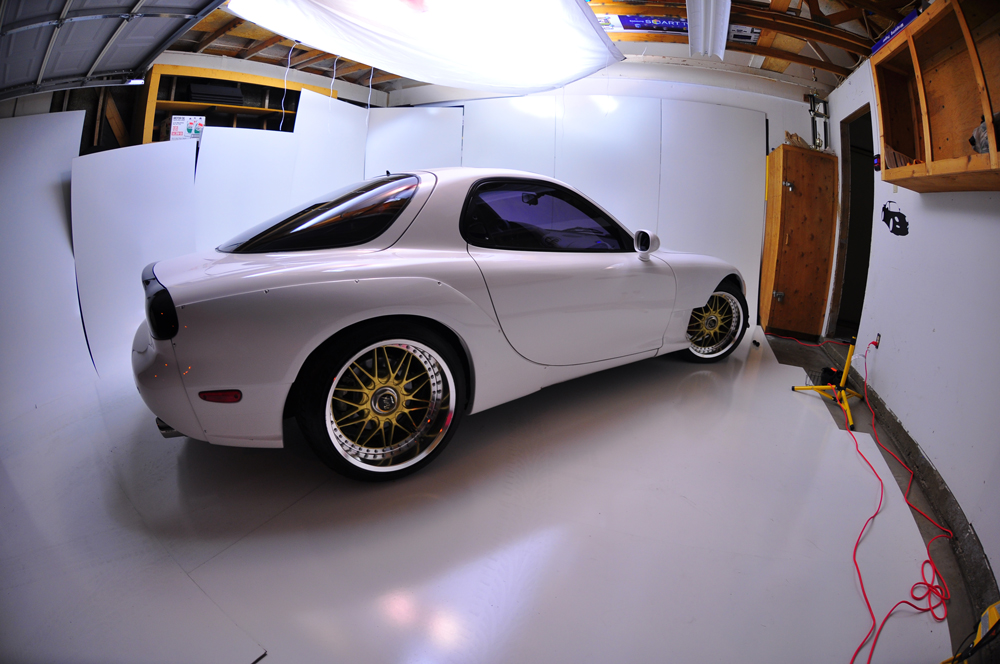
We had great success bringing this shoot together. We started at about 7:15a.m. and finished cleaning up at 10:00pm – All in a day’s work! After the shoot, JD took me for a ride in the whip. Vrooooooooom!!
Lowe’s closed at 9:00pm so we had to wait until the following morning to take back the goods. The sheets used could have been larger…although a california king is about as big as it comes. I’m thinking that the main light source should span larger than the vehicle (if we were pros, in a warehouse sized studio, and paid for a legit lighting system). In any case, we crushed it, turned out great results, and did everything with virtually no budget.
The title mentions that the budget for the shoot was virtually $0.01. You will be spending some money on gas, electricity, time spent working your ass off getting things in order and transporting the items and equipment needed.
When I returned my items at Lowe’s the difference in receipts was a penny. A penny well spent in my opinion and not worthy of argument, regardless of the computer’s mistake.
Here’s a link to all the photos:
DHP RX-7 Shoot
: )
Flynn B. Kaplan
Coordinator of Synergies
DoggHouse Productions
www.DoggHousePro.com